A technique-focused guide for anyone who already knows the rules of ring toss and wants to land more rings. It covers grip, stance, underhand release and follow-through, a miss-diagnosis table for reading short, long, left and right throws, and a practice progression that works with a weighted-post garden set.
Ring Toss Technique
If you already know how ring toss works, the gap between a good score and a frustrating one is technique, not luck. The short version: a still stance, a flat ring, a soft underhand release and a follow-through that points at the post will beat a hard, rushed throw every time. Then you read where each miss lands and correct one variable at a time instead of changing everything at once.
This guide is about how to play ring toss game better. It assumes you know the rules and scoring. It covers grip, stance, release, follow-through, how to diagnose a miss, and a practice progression you can run with a weighted-post garden set.
What actually moves your hit rate
- Keep the ring flat and level through the release instead of flicking it.
- Throw from a stance that does not move, so your distance stays constant.
- Change one thing at a time and watch where the ring lands, not just whether it rings.
- Move back only after about half your throws are landing.
Start With the Throw, Not the Distance
Most players who struggle start too far away. Distance hides technique problems because you cannot tell whether a miss came from a bad release or simply from being too far back. Learn the motion close in, then add distance once the motion repeats.
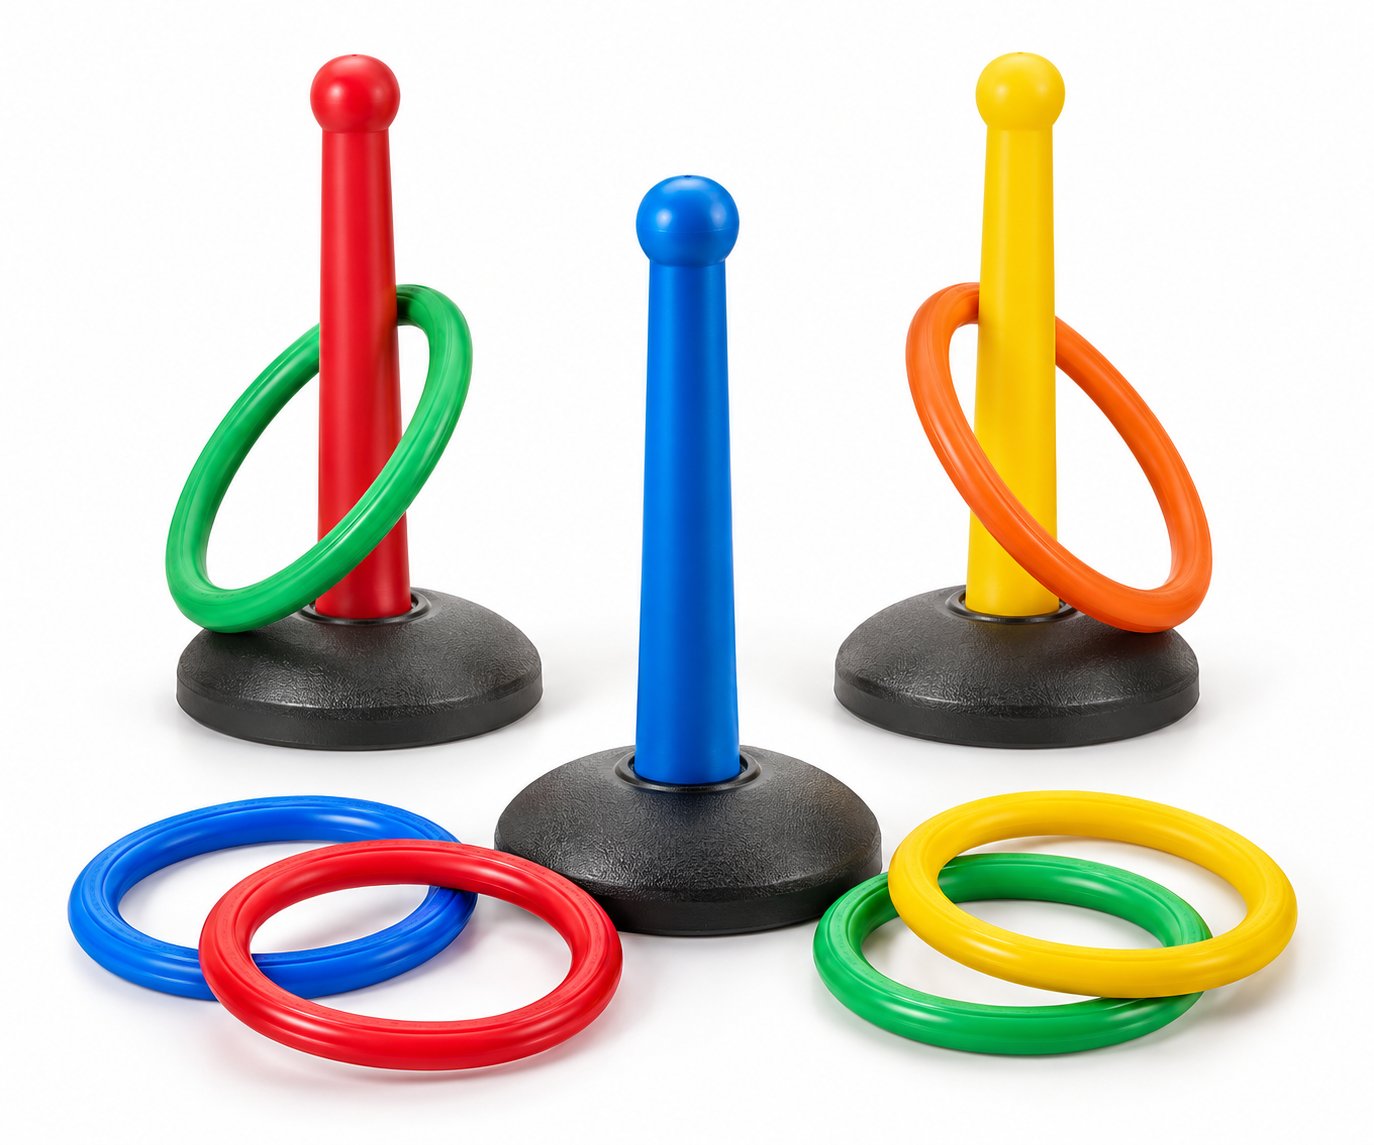
The ring itself makes this easier or harder. In a set such as the Ring Toss Garden Game Set, the rings are 18 cm in diameter and made of flexible PP. An 18 cm ring over a 45 cm post gives you a target opening that is generous enough to reward a flat throw but still narrow enough that a tilted ring will clip the post and bounce off. Flexible rings also return to shape after bending, so a ring that hits the post rim and deforms does not stay warped for the next throw.
Grip, Stance and Release
These three together decide the plane and speed of the ring. Work through them in order and keep them consistent.
- Grip the ring lightly. Hold the ring between thumb and fingers so the ring hangs level, roughly parallel to the ground, not vertical like a steering wheel. A death grip makes the ring wobble out of your hand.
- Set a stable stance. Feet about shoulder width, weight even, front foot pointing toward the post. If you are stepping forward as you throw, your release point moves and your distance changes throw to throw.
- Swing low and underhand. Let the arm swing down and back, then forward like a pendulum. The power comes from the swing, not from the shoulder.
- Release flat and early. Let the ring leave your fingers while it is still level and slightly before your hand reaches the top of the swing. Releasing late sends the ring up and long.
- Follow through toward the post. Finish with the hand pointing at the target and the palm facing up. A follow-through that stops suddenly usually means the ring left the hand late.
One more detail that matters more than people expect: the release height. Releasing from the same height every throw keeps the arc predictable. If you sometimes release at chest height and sometimes at waist height, you effectively have two different throws.
How to Read a Miss
A miss is information. Before you change your grip or your stance, look at where the ring landed relative to the post and change only the one thing that explains it.
| Where the ring lands | Likely cause | One change to try |
|---|---|---|
| Short, in front of the post | Released too late or with too little swing | Release a little earlier in the swing; let the arm swing through instead of pushing |
| Long, past the post | Released too late with too much arm speed, or an upward flick | Slow the swing slightly and release when the ring is level |
| Left of the post | Body or front shoulder opening early; hand path drifting across | Keep the chest facing the post through the release and send the hand straight down the line |
| Right of the post | Hand path drifting, or stance aimed off target | Check that the front foot and chest actually point at the post, then repeat the straight hand path |
| Ring hits the post and bounces off | Ring arrived tilted, not flat | Grip level, release level; keep the ring parallel to the ground as it leaves the hand |
| Inconsistent, no pattern | The stance or release point is changing between throws | Freeze the stance and release height first; only then work on aim |
Do not fix two rows at once. If you change your grip and your stance in the same round, you cannot tell which change helped.
A Practice Progression That Works
The principle behind every step: start where about half your throws land, and move back only after that becomes reliable. Half is a working target, not a score to record. If you land almost every throw, you are too close to be learning anything; if you land almost none, you are too far to correct anything.
Step 1: Short range, technique only
Stand close enough that you can hit about half your throws without forcing. Throw a set of rings with no scoring and no target distance in mind. Your only job is to repeat the same grip, stance, release height and follow-through. Stop when the motion starts to feel the same each time.
Step 2: Short range, aim correction
Stay at the same distance and start using the miss table. Pick one miss direction, apply one change, and throw until the pattern shifts. Left and right misses usually come from stance and hand path, so fix those before touching speed.
Step 3: Step back gradually
Move back in small steps, not one big jump. At each new distance, expect your hit rate to drop, then build it back to about half before moving again. This is the same principle coaches use in any target sport: distance is added after control, never before it.
Step 4: Add variety
Once you can hold a decent rate at your working distance, change the conditions on purpose. Alternate between two distances. Throw a few rings with a deliberate pause before release. Vary nothing about the throw itself, only the setup around it. This builds the ability to adjust to a new spot on the lawn, which is exactly what happens at a family gathering or a school event.
What Equipment Traits Mean for Practice
If you are organizing play for a family, a school or an activity group, the set's specs change how the practice progression feels.
| Trait | What it means during practice |
|---|---|
| Ring diameter 18 cm | A wider opening tolerates a slightly tilted release; a narrower one punishes it. At 18 cm, a flat throw is rewarded but a rushed, tilted throw still clips the post. |
| Post height 45 cm | Determines the arc you are throwing. A taller post asks for a higher release and a longer arc; a short post suits a flatter, closer throw. Set your starting distance so the arc feels natural rather than forced. |
| Flexible PP rings that return to shape | A ring that bends on impact and springs back keeps every throw comparable. Stiff or permanently deformed rings change how they sit in the hand and how they behave on the post. |
| Rounded post tops | Rounded tops let a slightly off-center ring slide down and settle rather than catch on a sharp edge. |
| Weighted posts that push into grass or sand without tools | The post stays upright through repeated hits, so your target does not lean or drift while you practice. A moving post makes miss diagnosis almost impossible. |
The Ring Toss Garden Game Set carries six flexible PP rings and three weighted posts, is rated for ages 3 and up, and is EN71 and ASTM F963 compliant. For group use, three posts let several players throw at once or let one player practice at three distances without moving equipment. The set is available at a minimum order quantity of 500 sets.
Common Mistakes to Stop Making
- Throwing harder to fix a short miss. A short throw is usually a timing problem, not a power problem. More force makes it longer and less accurate.
- Changing distance to fix aim. Move back only after the technique is stable, otherwise you are guessing at two variables.
- Tilting the ring like a steering wheel. The ring should stay flat and parallel to the ground through the release.
- Practicing tired. Technique practice depends on repeatability. Short, focused rounds beat long, sloppy ones.
- Ignoring the post. Check that the post is upright before each round. A leaning post makes every throw read as a miss.
Conclusion
Better ring toss comes from three habits: a repeatable underhand throw with a flat release and a real follow-through, a habit of reading each miss and changing one variable, and a practice progression that starts close and moves back only when about half your throws land. The equipment should support that, not fight it, which is why ring diameter, post height, ring flexibility and a post that stays put all matter.
If you are sourcing ring toss sets for a school, a retail program or a family activity range, the specs above are the ones worth confirming against your own requirements before you commit to an order.
Practice distances and hit rates in this article are described as principles, not fixed standards. Set your own starting distance based on where your throws begin to land consistently.